Просмотр новости
Найдите то, что Вас интересует
 Спутники
 РН
РН SpaceX
 Роскосмос
 NASA
NASA
СпутникиРНSpaceXРоскосмосNASALearn how to display forms in WordPress popups using the Gravity Forms Popups Add-On. You can choose from multiple popup types, add targeting and trigger rules, and more.

Ever wished that you could access a built-in feature to display your forms in different types of popups?
While Gravity Forms has always been easy to integrate with third-party popup plugins, the new Gravity Forms Popups Add-On now gives you a built-in way to display your forms in four different types of popups, complete with plenty of trigger and targeting rules.
In this post, we’ll introduce you to how the add-on works in more detail.
Then, we’ll show you step-by-step how to set it up and start creating your own form-embedded popups on your site.
Note: The Gravity Forms Popups Add-On is part of Gravity Labs — our home for experimental add-ons. It’s free with your Gravity Forms license, but it’s experimental and outside our official support. Labs is also how we learn what our community wants to see in the product, so if you try it, let us know what you think.
With the Gravity Forms Popups Add-On, you can display any form on your site in a few different kinds of popups, including the following:
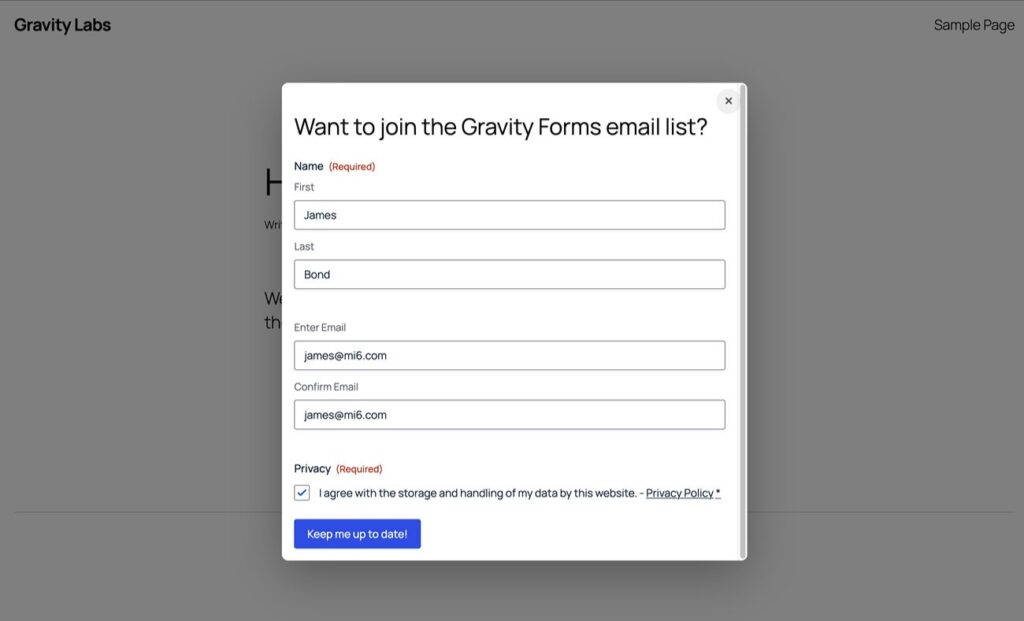
You also get plenty of design and behavior settings to control the experience for each popup.
In addition to supporting different types of popups, the add-on also offers all of the targeting and trigger rules that you’d expect from a popup tool.
To trigger the popup, you can choose from six different trigger types:
You can also set up one or more targeting rules to control where/to whom the popup should display. You can group multiple conditions together and set up as many targeting groups as needed:
Accessing this functionality from inside Gravity Forms eliminates the need to use third-party popup plugins just for your forms. This can…
Now, let’s get into the full step-by-step guide on how you can display the forms that you create with Gravity Forms in flexible popups.
Below, we’ll take you through every step in the process. Let’s dig in…
To get started, you need to install the Gravity Forms Popups Add-On on the site where you’re using Gravity Forms.
As we mentioned above, the Popups Add-On is part of Gravity Labs. While these add-ons are free with any Gravity Forms license, they sit outside the normal suite of Gravity Forms add-ons.
First, you need to download the add-on from the Gravity Labs website:
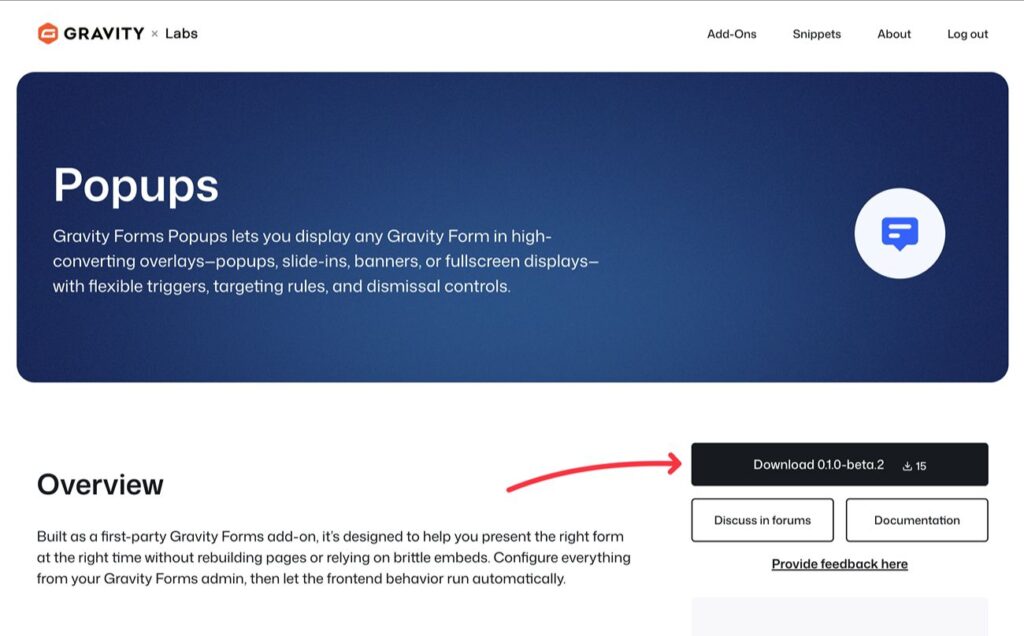
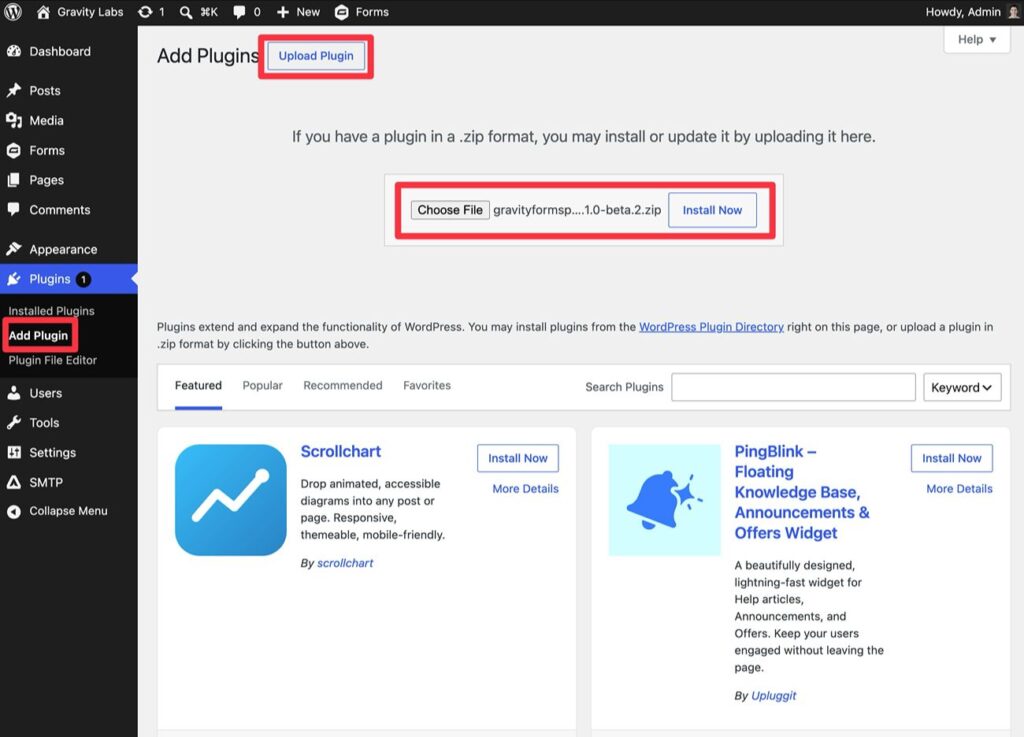
This will download the add-on’s ZIP file to your local computer. You can then upload and install it like any other WordPress plugin:
If you haven’t already done so, you’ll now want to create the actual form that you want to display in a popup.
You can create the form just like you normally would – there aren’t any special settings that you need to configure inside the form editor interface.
With that being said, because the form will display inside a popup, you should try to keep it as short as possible. For longer forms, you can divide it into multiple pages – the multi-page layout will still work in the popup.
For our example, we just created a simple email opt-in form using the pre-made Newsletter Signup Form template. However, you can embed any type of form in the popup.
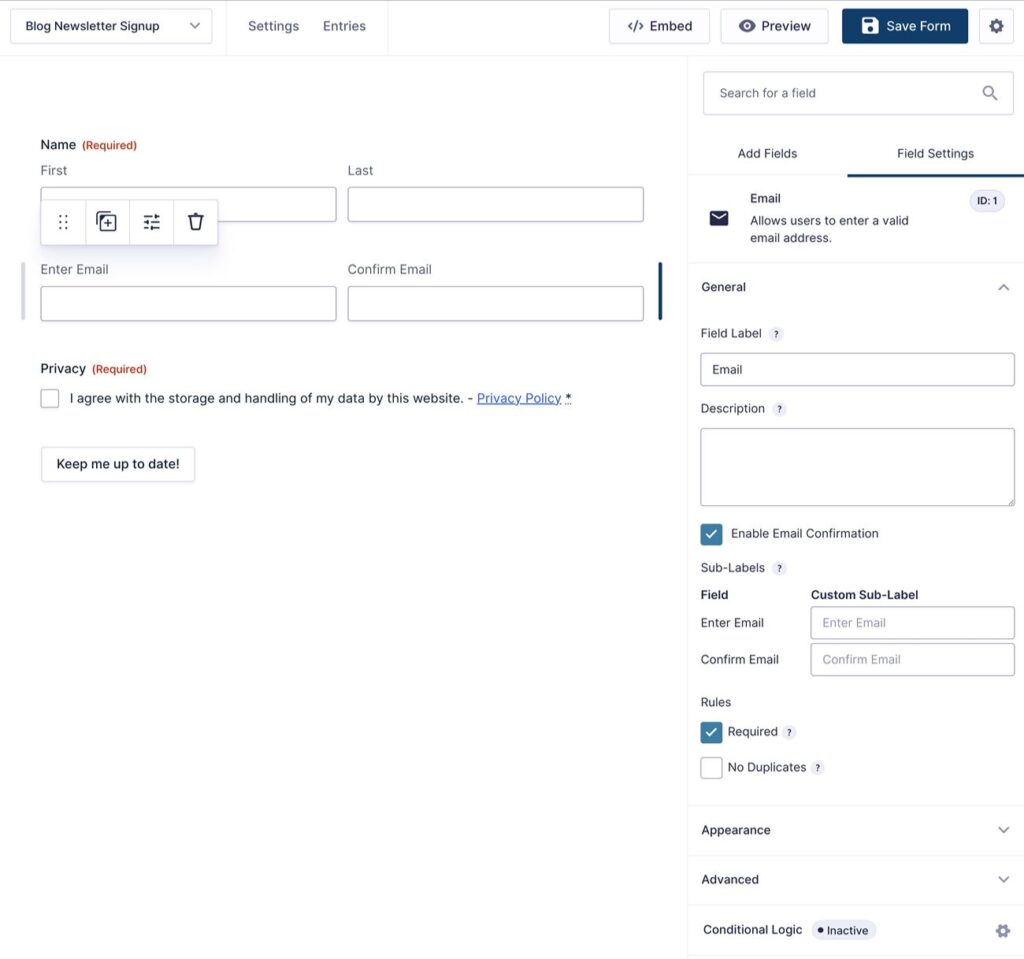
Once you’ve set up your form, you can create a popup for your form by going to Forms → Popups in your WordPress dashboard.
Then, click Add New to create your first popup.
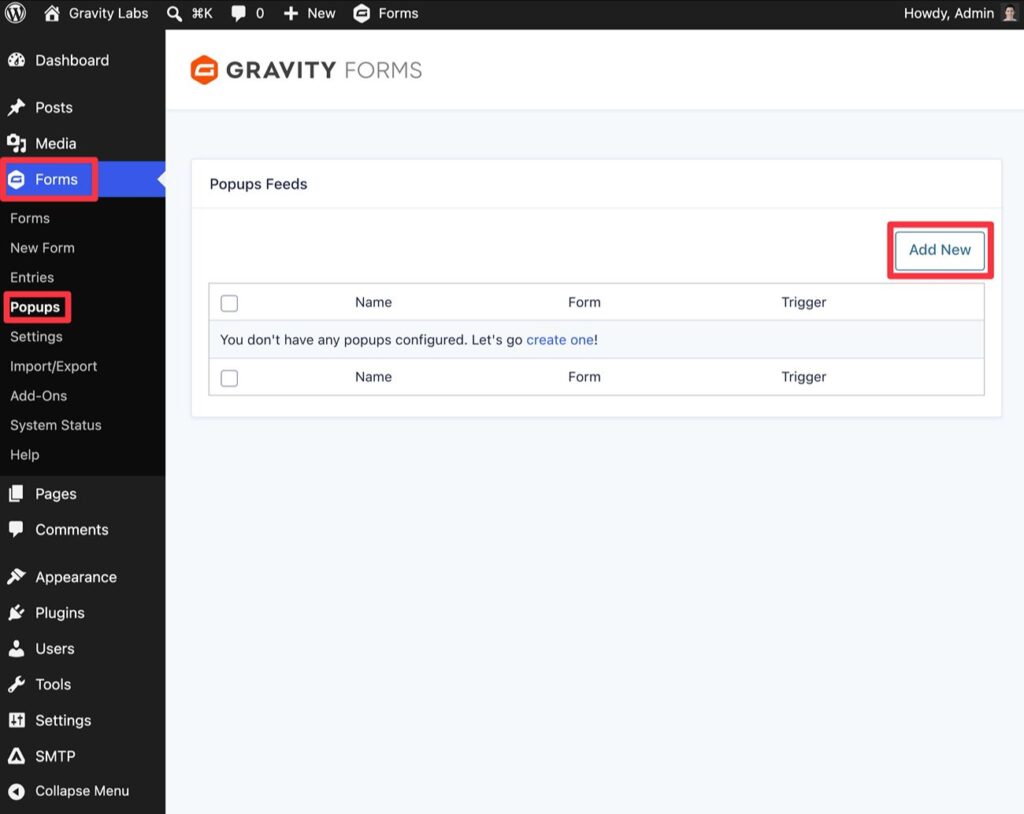
Now, you’ll be in the interface to configure your popup.
At the top, you need to make three important choices:
Below those options, you’ll see additional settings for your popup divided into four different tabs:
We’ll cover each tab in subsections below.
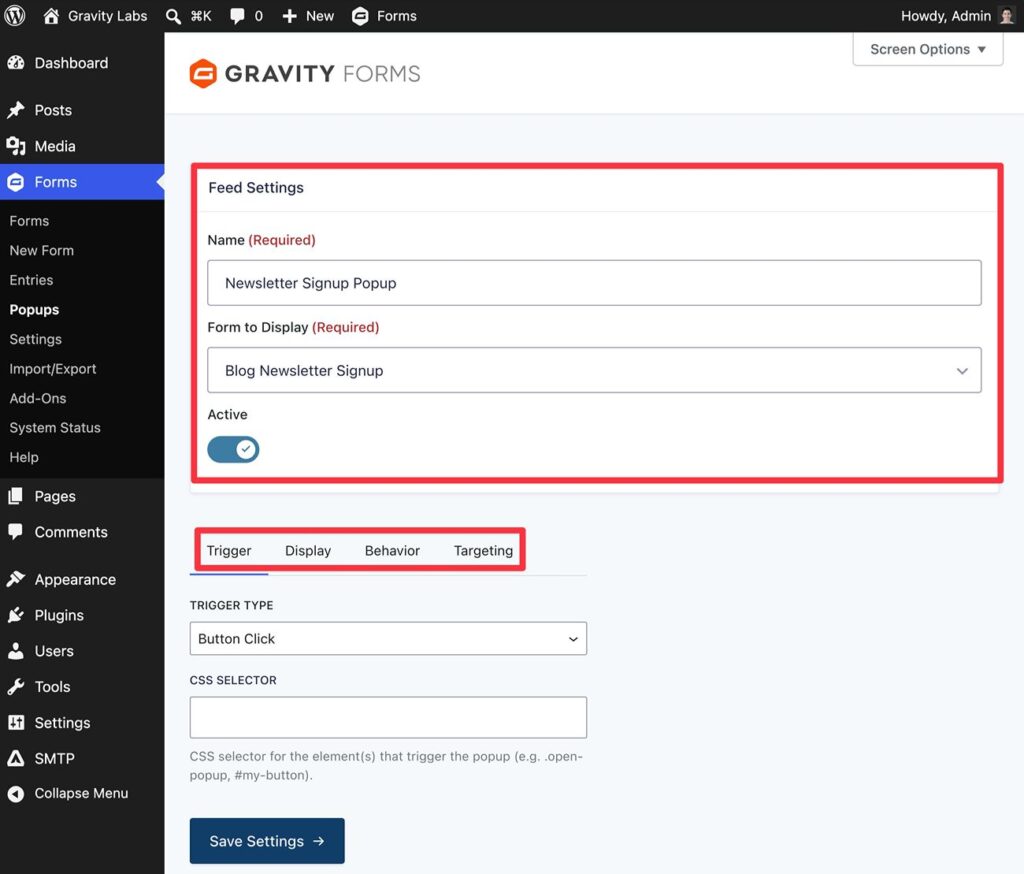 Trigger settings
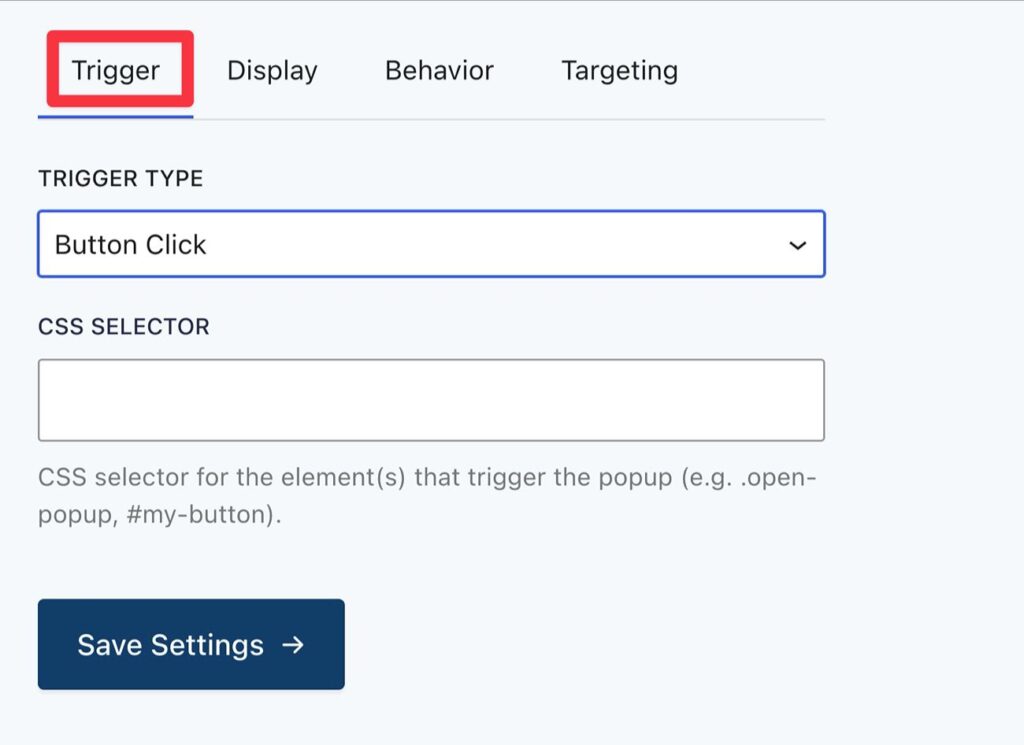
The Trigger settings let you control how to launch the popup. The drop-down lets you choose from six different options:
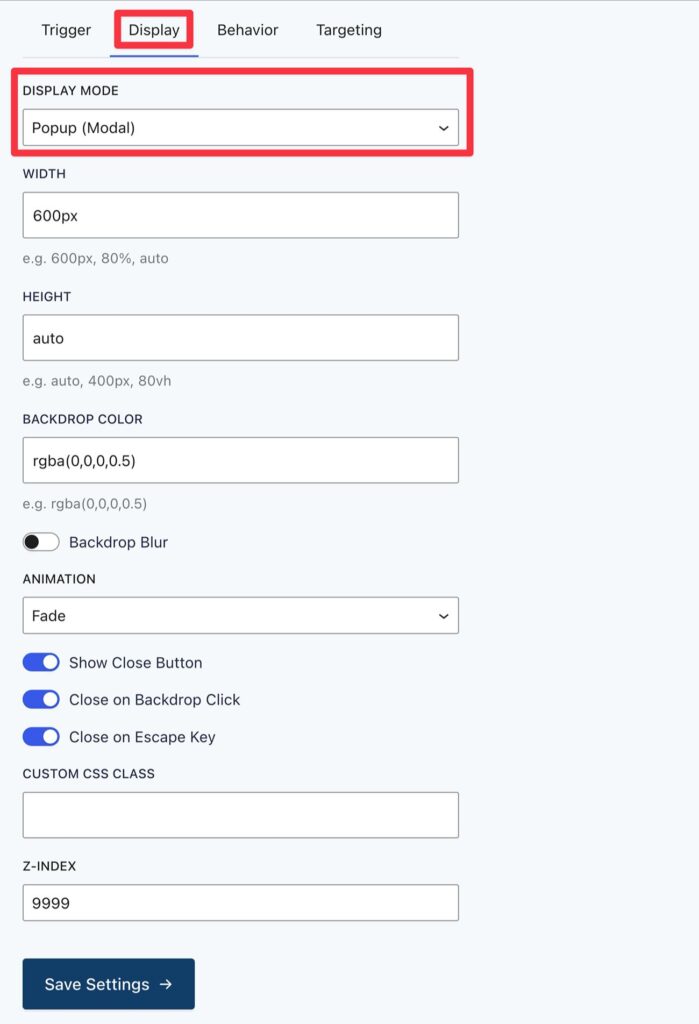
 Display settings
The Display settings let you control the design and style of the popup.
One of the most important choices is the Display Mode, which lets you choose from four different types of popups:
Based on the type of popup that you choose, you’ll then get a variety of display options that are specific to that display mode.
For example, if you use a modal popup, you can control the size, colors, and other display elements.
 Behavior settings
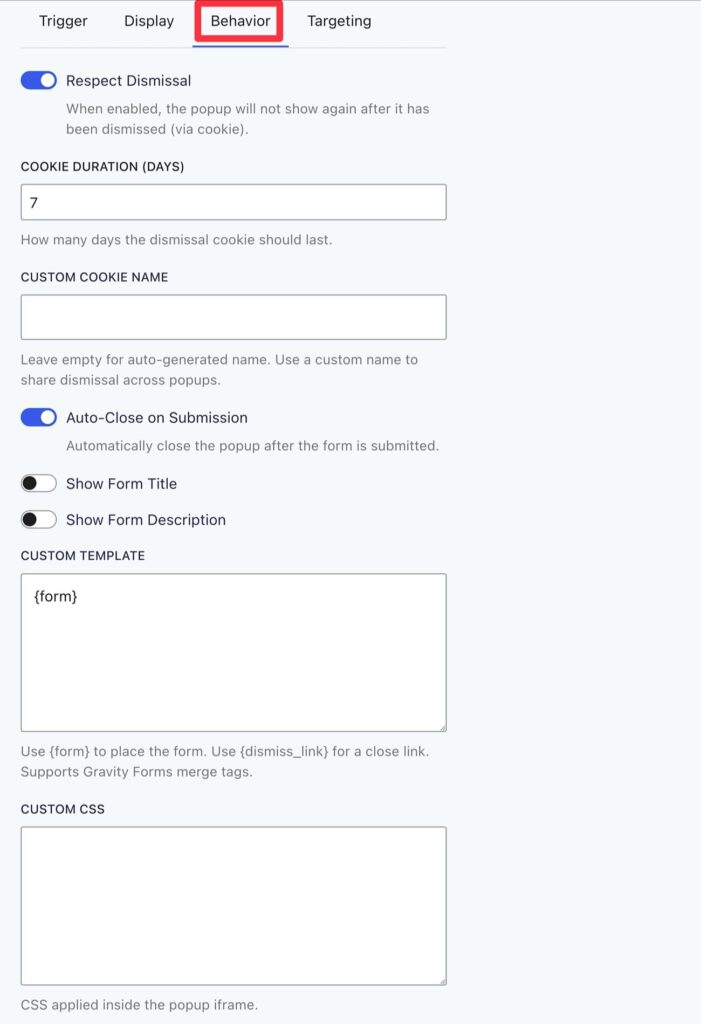
The Behavior settings give you more control over how your popup behaves.
Here are some explanations of some of the most notable settings:
 Targeting settings
The Targeting settings let you define the conditions to control where the popup should display. For example, you can target the popup to specific content on your site, specific types of users, or a mix of both.
To get started, you can add at least one targeting group. You can also create multiple targeting groups if needed.
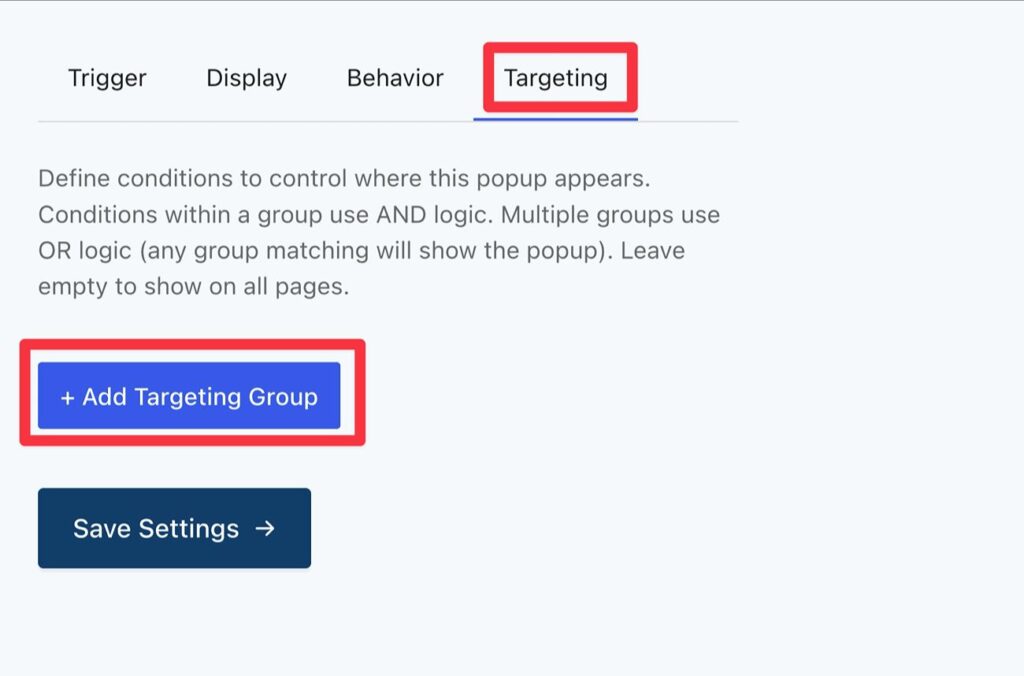
Each targeting group can contain one or more conditions that must be met in order to display the popup.
You can currently use six different targeting rules, each of which also comes with its own boolean operators – for example, “IS” (only include these pages) or “IS NOT” (exclude these pages):
Again, you can add multiple conditions within a single targeting group. For example, you could only display the popup if the user is logged in AND is viewing a certain post type.
You can also leave the targeting rules empty to display the popup to every user on every page.
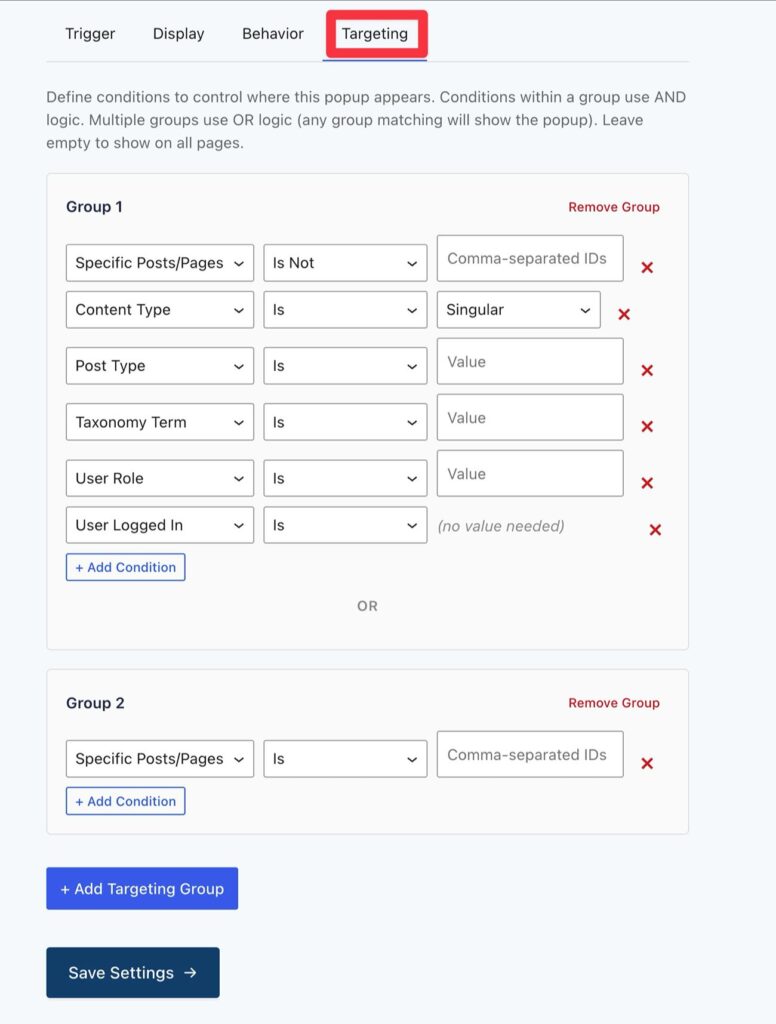
And that’s it! Once you’ve made your choices, make sure to click the Save Settings button at the bottom to save your popup.
To test your popup, you can open a page that meets your targeting conditions and simulate the trigger that you chose.
Note – If you added targeting rules about a user’s logged-in status or user role, make sure that you meet those conditions as well. For example, if your popup targets users who are not logged in, you would need to open the page in a private browsing window or log out of your WordPress account.
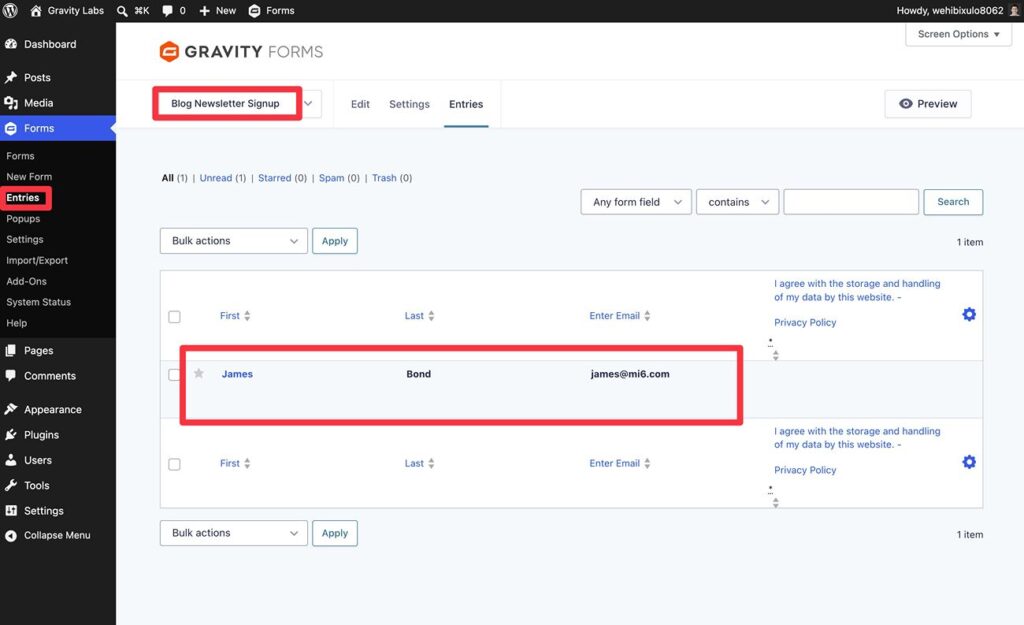
Any form submissions that come from the popup will show up in the normal Gravity Forms entries area (Forms → Entries → Choose your form from the drop-down).
And that’s it!
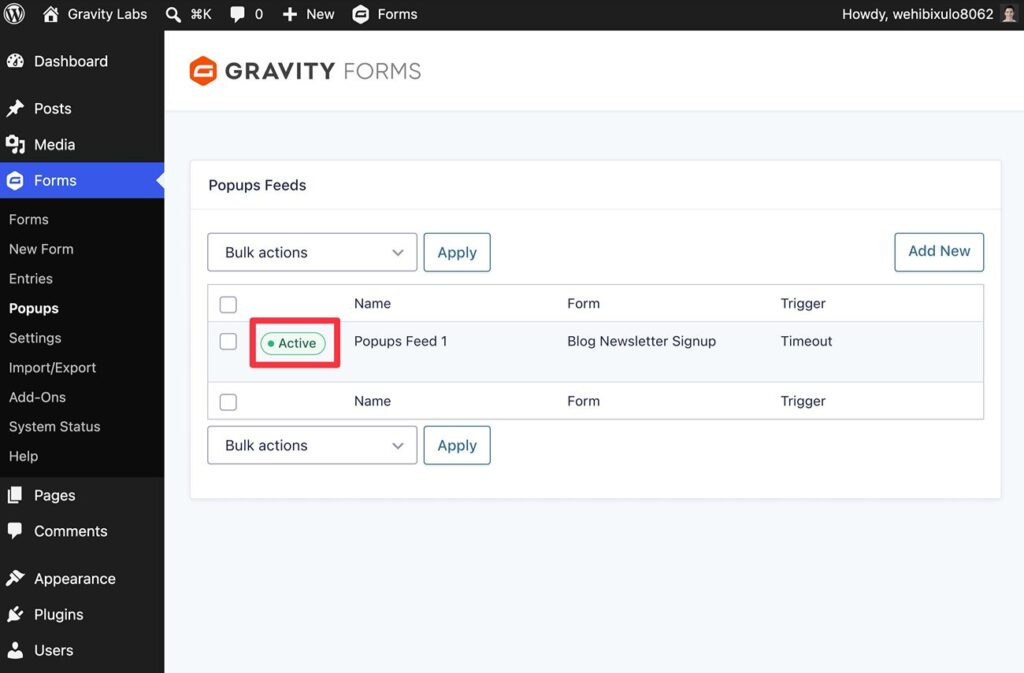
If you ever want to turn off a popup, you can go to Forms → Popups and click on the toggle to switch between Active and Inactive.
You can also delete popups if you don’t want to use them anymore.
With the Popups Add-On, you get a Gravity Forms-native solution for displaying any type of form in a popup on your site. While there are existing third-party solutions that can accomplish similar implementations, being able to do everything from Gravity Forms reduces the chances of compatibility issues and can save you from needing to purchase a license for another plugin.
The Popups Add-On is available now in Gravity Labs. It’s free with any Gravity Forms license. As a Labs add-on, it’s experimental and sits outside our standard support — and your feedback helps shape what we build next. If you give it a try, we’d love to hear how it works for you.
 Newsletter
If you want to keep up-to-date with what’s happening on the blog sign up for the Gravity Forms newsletter!
"*" indicates required fields
| # | Наименование новости | Тональность | Информативность | Дата публикации |
|---|---|---|---|---|
| 1 | Drip for WordPress: How to get started with the Gravity Forms Drip Add-On | 0 | 7.45 | 23-07-2026 |
| 2 | Mailjet for WordPress: How to get started with the Gravity Forms Mailjet Add-On | 0 | 7.45 | 16-07-2026 |
| 3 | Google Docs + WordPress: How to get started with the Gravity Forms Google Docs integration | 0 | 5.08 | 20-08-2026 |
| 4 | How to get started with AbuseIPDB for WordPress form protection | 0 | 7.74 | 14-09-2026 |
| 5 | How to build a photography booking system with Gravity Flow | 0 | 5.1 | 27-07-2026 |
| 6 | Багаевская: Ночь 18 дек, Вт | 0 | 0 | 17-12-2018 |
| 7 | Антон Чиж Машина страха Рецензия на книгу Антона Чижа «Машина ... | 0 | 0 | 21-02-2025 |
| 8 | Дмитрий Борисов Стихи Любовь Такая разная То сладость То война ... | 0 | 0 | 21-02-2025 |
| 9 | Агидель: Ночь 20 дек, Чт | 0 | 0 | 19-12-2018 |
| 10 | Анкара обвинила экс-представителя Трампа по борьбе с ИГ в пропаганде терроризма | 0 | 0 | 20-01-2019 |